How To Make Graffiti
Graffiti Drawing Tutorial Part 1:
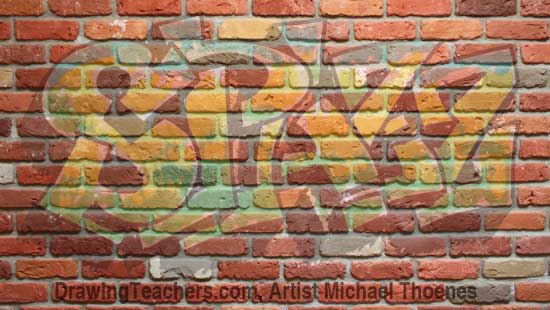
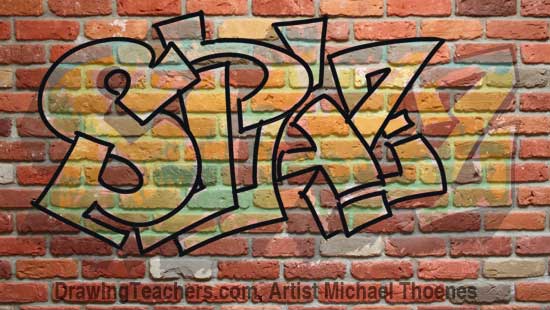
To begin this
demonstration, I have superimposed the final product on a brick background and
will then build each letter over the ghosted image. The word we ar working with is SPAZZ.
To begin this
demonstration, I have superimposed the final product on a brick background and
will then build each letter over the ghosted image. The word we ar working with is SPAZZ.
Graffiti Drawing Tutorial Part 2:
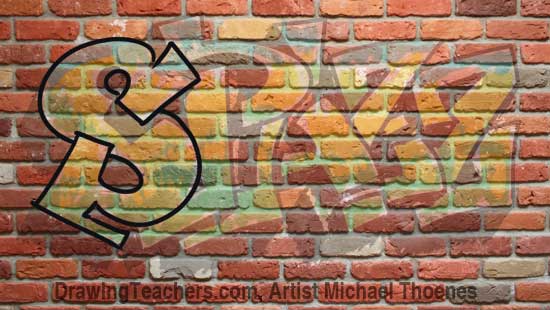
Begin by forming the shape
of the letter "S" The unique graffiti style elements of this letter shape are
the way the beginning and end of the letter are distorted to overlap the
center of the "S". The bottom of the letter also has an extra extension which
helps the "S" to mirror the slope of the final "Z" in "SPAZZ." It is helpful
to lightly sketch out your design and work out the letters and how they
overlap. The more letters you write, the bigger your memory library
gets.
Graffiti Drawing Tutorial Part 3:
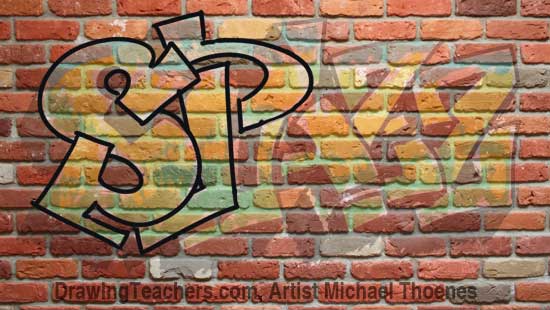
The next letter is the "P"
and it comes out from behind the "S". I have broken the letter into two parts.
Both the top and bottom of the letter have extensions.
The next letter is the "P"
and it comes out from behind the "S". I have broken the letter into two parts.
Both the top and bottom of the letter have extensions.
Draw Graffiti Tutorial Part 4:
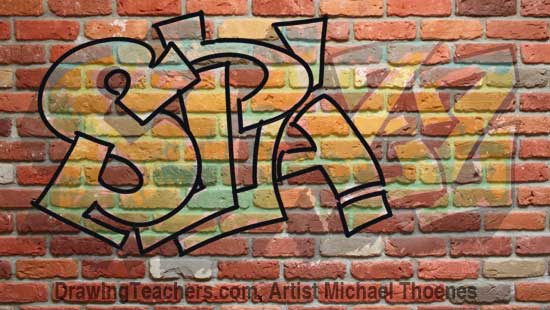
The letter "A" is also broken
into two parts. The right side as extension and the lower left has a split.
Breaking a letter into parts adds style to your letters. . Notice how the
curve of the top pf the "P" slopes into the curve of the "A". This helps to
connect the letters in the design.
The letter "A" is also broken
into two parts. The right side as extension and the lower left has a split.
Breaking a letter into parts adds style to your letters. . Notice how the
curve of the top pf the "P" slopes into the curve of the "A". This helps to
connect the letters in the design.
Graffiti Drawing Tutorial Part 5:
The first of the two "Z's"
has the the top and tail tucking behind the center of the letter. The lower part
has a split.
The first of the two "Z's"
has the the top and tail tucking behind the center of the letter. The lower part
has a split.
Draw Graffiti Tutorial Part 6:
For the final "Z", I chose to
have the top overlap the center and the bottom tuck behind. Ultimately I wish
I had made the final "Z" lager to better balance the "S" ut r that is all part
of the learning process. AS you experiment with your graffiti letter writing
you will revise your designs many times. Keep experimenting and improving.
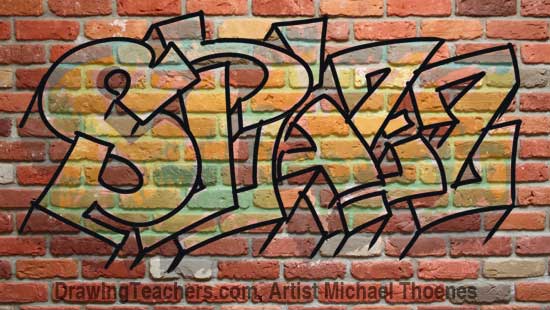
Graffiti Drawing Tutorial Part 7:
The 3D
side of these graffiti letters will fall to the lower left, so I have drawn
angled lines to define the edges of the 3D letters.
The 3D
side of these graffiti letters will fall to the lower left, so I have drawn
angled lines to define the edges of the 3D letters.

Graffiti Drawing Tutorial Part 8:
Rather
than define a hard back edge to the letters, I chose to leave it sketchy and
jagged as if it was painted loosely and in a hurry.
Rather
than define a hard back edge to the letters, I chose to leave it sketchy and
jagged as if it was painted loosely and in a hurry.
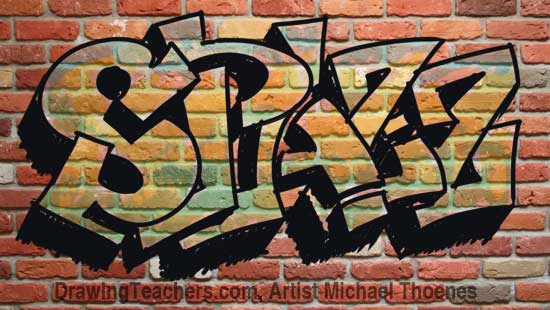
Graffiti Drawing Tutorial Part 9:
Color
your graffiti with vivid colors to make it pop off the background. I have used
bight blues, yellows and green with spots of purple to paint these graffiti
letters.
Color
your graffiti with vivid colors to make it pop off the background. I have used
bight blues, yellows and green with spots of purple to paint these graffiti
letters.

